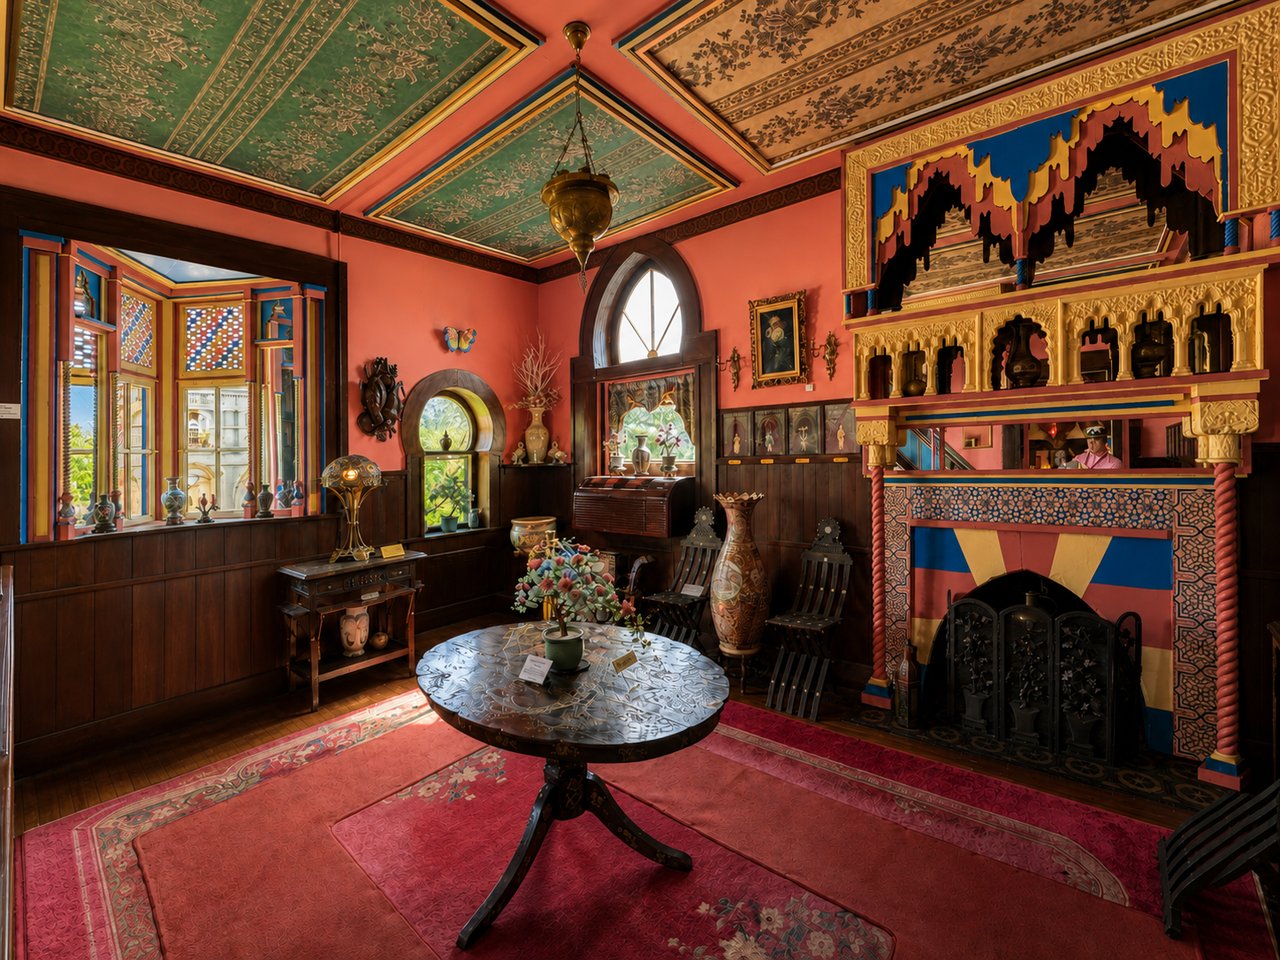
Are buyers scrolling past your listing before they ever book a showing? In Anderson, where most home searches begin on a phone, your first impression comes from photos and video long before anyone walks through the door. If you want top attention and stronger offers, staging for the camera and for in-person showings is a smart, budget-friendly move.
You want practical steps that work in our Upstate market, not vague advice. This guide gives you a design-forward, room-by-room plan tailored to Anderson homes, plus a simple timeline, upgrade ideas with strong ROI, and a clear checklist. You will also see how a professional, phased approach keeps stress low and results high. Let’s dive in.
Why staging matters in Anderson
Anderson offers a mix of older downtown homes and newer suburban neighborhoods. Buyers here often prioritize good overall condition, updated kitchens and baths, usable outdoor space, and convenient access to schools, shopping, Lake Hartwell, and regional job hubs like Greenville, Spartanburg, and Clemson. Staging helps highlight those strengths and reduce distractions.
Our climate is humid subtropical. Summers are hot and humid, and winters are mild. That means landscaping and exterior maintenance show differently by season. In summer, emphasize shade, screened porches, and HVAC performance. In cooler months, lean into cozy interior staging, warm lighting, and comfort.
Industry findings consistently show that staged homes attract more online attention, generate more showings, and often sell faster and closer to list price than unstaged homes. Strong photos and video help buyers picture themselves living in your home, which can shorten decision time and increase perceived value.
Online-first staging
When buyers scroll, you have a few seconds to earn a click. Stage what the camera sees before anything else.
Photography basics that sell
- Brightness and clarity: Replace dim bulbs with daylight-balanced LEDs, clean windows and fixtures, and open blinds. Bright, even light helps rooms feel larger and newer.
- Composition and declutter: Remove extra furniture and personal items so the camera can show clean lines and open floors. Use a mix of wide shots and a few detail photos for texture.
- Mobile-first framing: Many buyers view listings on phones. Capture high-resolution horizontal images for MLS galleries and have vertical crops ready for mobile and social use.
- Timing: Schedule photos on a bright day, ideally morning or late afternoon for balanced exteriors and softer interior light.
Video tours that convert
- Keep social-friendly walkthroughs to 60–120 seconds and full guided tours to 3–6 minutes.
- Use smooth pacing with a stabilized gimbal. Start at the entry, then move through living, kitchen, and main bedroom before finishing with outdoor areas.
- Add simple on-screen notes that call out key features, like new lighting, refreshed grout, recent HVAC service, or outdoor living zones.
3D tours and floorplans
- Consider a 3D tour for mid to higher price points or when you expect out-of-area buyers. It lets people pre-qualify themselves and boosts showing quality.
- Floorplans reduce questions about room sizes and layout flow. They help buyers understand how they will live in the home.
Virtual staging the right way
- Virtual staging can be useful for vacant homes if a full furniture install is not in budget.
- Always disclose virtual staging per MLS rules. Do not misrepresent room scale or finishes.
In-person staging
Once you earn the showing, keep the experience easy and memorable.
Flow and focal points
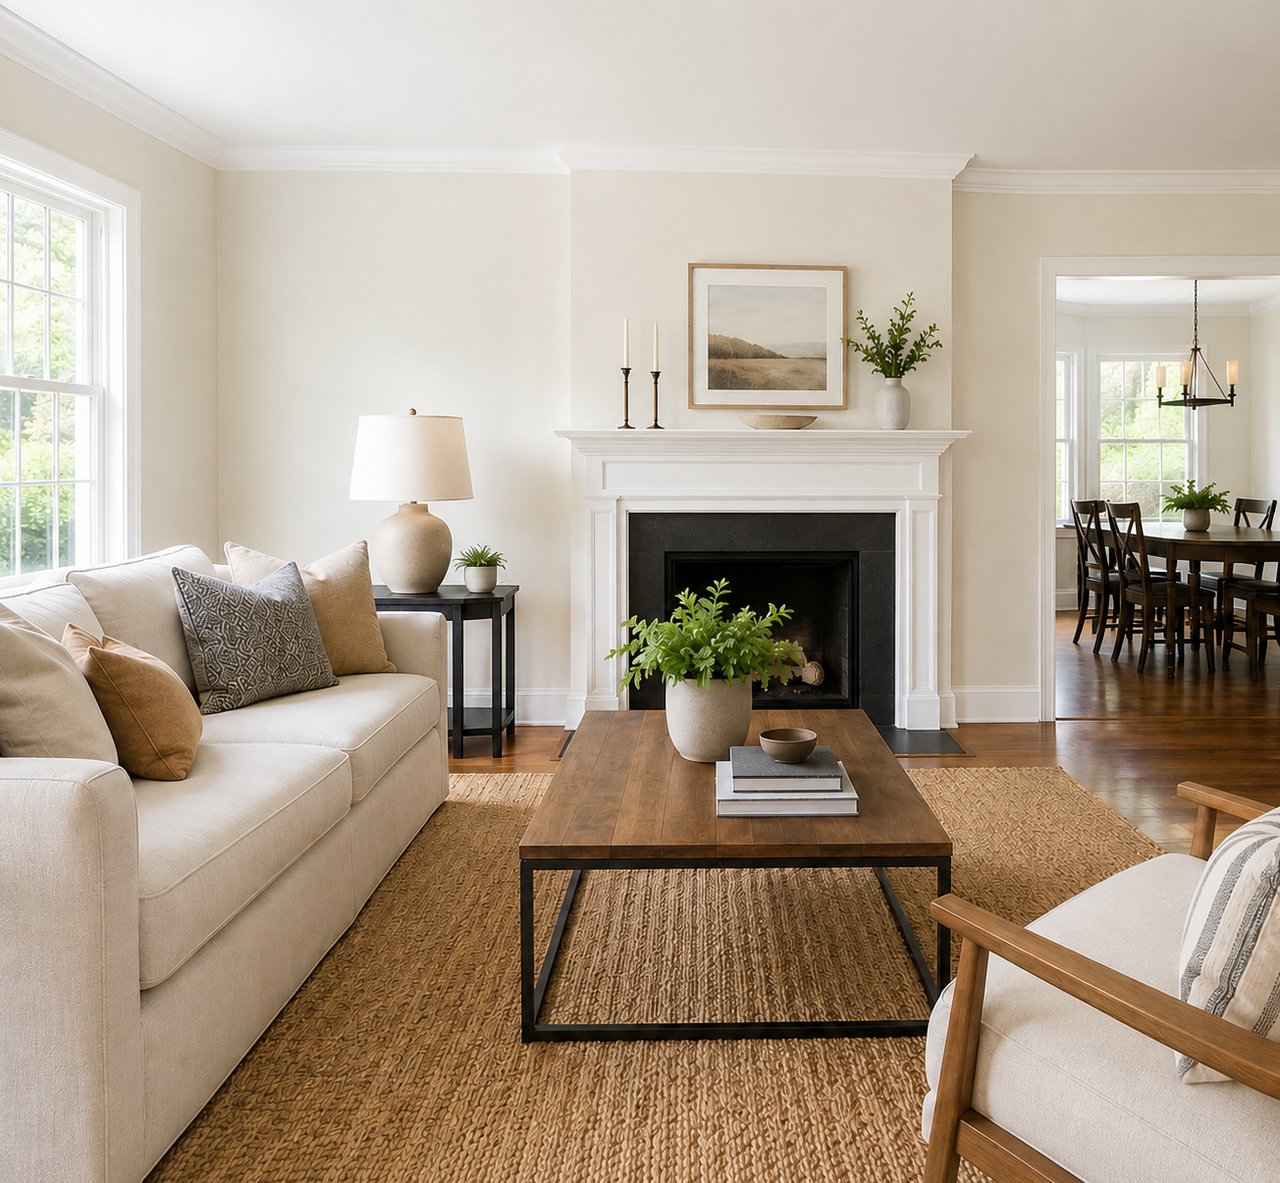
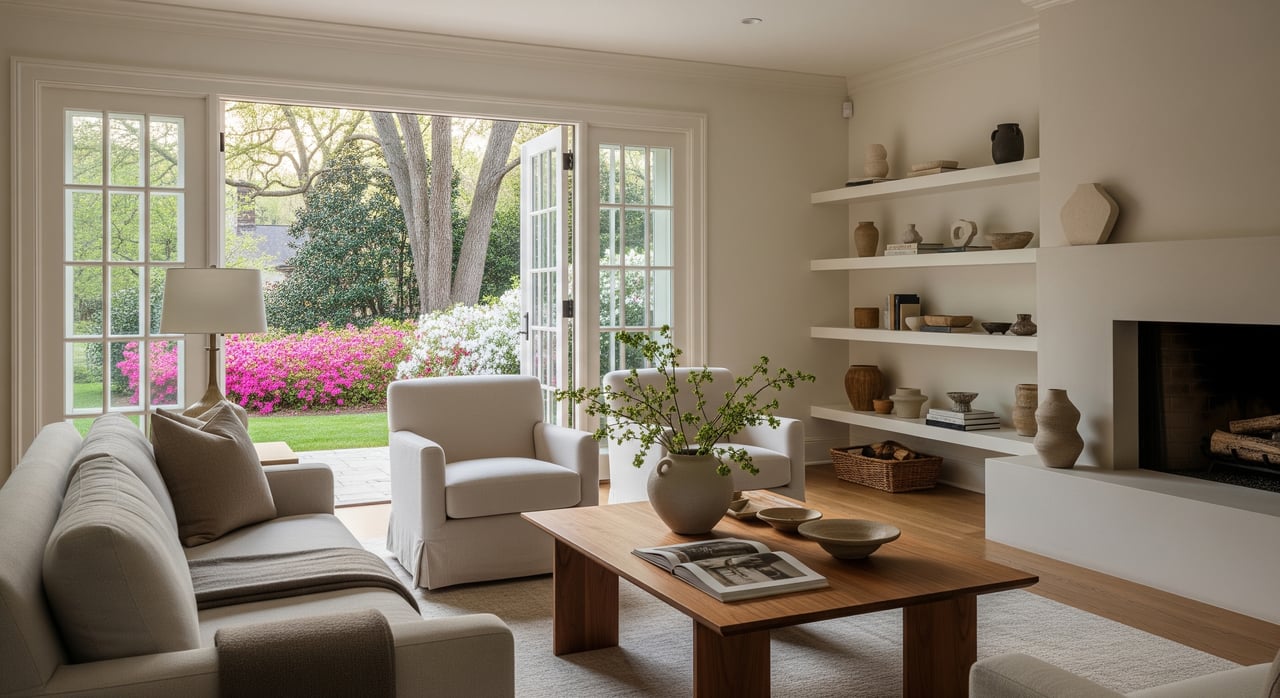
- Create clear paths: Remove bulky pieces and extra side tables. Show logical conversation areas in living rooms.
- Lead the eye: Place a simple focal point in each room. This could be a styled mantle, a tidy kitchen island, or a crisp bed with neutral bedding.
- Entry sequence: A clean porch, visible house numbers, and a fresh mat set a welcoming tone before the door opens.
Light, scent, and comfort
- Lighting: Turn on all lights for showings. Replace burned-out bulbs and aim for consistent warmth.
- Scent: Keep it neutral. Avoid heavy candles or strong food smells.
- Temperature: In summer, show that HVAC holds a comfortable setting. In winter, aim for a cozy, even feel.
Curb appeal that welcomes
- Tidy lawn edges, fresh mulch, and trimmed shrubs are high-impact.
- Power-wash walkways and siding if needed. Clean gutters and check for cobwebs at the entry.
- Add two potted plants and a simple seating vignette on the porch if space allows.
Room-by-room priorities
Focus first on areas that drive photos, clicks, and live impressions.
- Curb and exterior: Trim lawn and hedges, power-wash, refresh mulch, and stage the porch with a chair set and planters. Make sure house numbers are easy to read.
- Entry and foyer: Clear sightlines and surfaces. Use a clean mat and one tasteful piece of art or a mirror.
- Living room: Remove extra furniture to open traffic flow. Arrange seating to suggest conversation. Use neutral textiles and one simple coffee table vignette.
- Kitchen: Clear countertops. Tuck away small appliances. Add a bowl of fruit or a small plant, fresh towels, and confirm all lights work, including under-cabinet fixtures.
- Dining room: Set the table simply with neutral place settings and a low centerpiece. Ensure the furniture scale fits the space.
- Primary bedroom: Use neutral bedding and two matching lamps. Remove personal photos and show off closet space by reducing contents.
- Secondary bedrooms: Stage to reflect demand. Consider a guest room, nursery, or home office to show versatility.
- Bathrooms: Clear surfaces, seal grout, add bright white or neutral towels, a fresh shower curtain, and a simple soap dispenser.
- Home office: Show a clear workspace with good lighting and tidy cords.
- Basement or attic: Present clean storage zones or a simple media or workout area. Repair any visible issues.
- Outdoor living: Clean the grill, define dining and lounging zones, and show shade solutions for summer.
Quick upgrades with strong ROI
Anderson buyers are value conscious. Visible condition and cleanliness go a long way.
Low-cost, high-impact
- Paint touch-ups or a neutral coat in high-traffic areas
- Deep cleaning, window washing, and decluttering
- Lighting upgrades with brighter LEDs and updated shades
- Landscaping refresh with mulch, trimmed shrubs, and a few entry planters
Mid-cost refreshes
- Kitchen: New cabinet hardware, fresh grout or caulk, or painted cabinets if appropriate
- Bath: Updated mirror, faucet, and vanity hardware
- Flooring: Targeted repair or refinishing, plus runners to unify traffic paths
When to invest more
- Consider new countertops or appliances only if local comps show kitchen condition drives price in your segment.
- Address structural, roof, or HVAC items as necessary maintenance. These support buyer confidence and appraisals.
Timeline, budget, and expectations
A straightforward plan keeps stress down and quality up.
- 1–2 weeks before listing: Consultation and staging plan. Complete decluttering and small repairs.
- 3–7 days before photos: Professional cleaning and styling or staging install.
- Photo and video day: Expect 2–4 hours, scheduled at peak daylight.
- Live on market: Finalize copy, publish visuals, and launch.
Typical budgets vary by size and scope:
- DIY staging and cleaning: under $500
- Partial professional staging for key rooms: roughly $500–$2,000
- Full staging for vacant homes: roughly $1,500–$6,000 or more based on size and duration
- Professional photography packages: roughly $150–$600, with add-ons for drone, video, and 3D
Track outcomes so you can measure impact:
- Listing views and inquiries after pro photos and tours
- Showings per week and time to first offer
- Final sale relative to list price and comparable sales
Seasonal tips for Anderson:
- Summer: Emphasize shade, screened porches, ceiling fans, and efficient HVAC.
- Fall and winter: Layer textiles, use warm lamps and soft throws, and highlight insulation and comfort.
Showings and open houses
Help buyers feel at ease so they can focus on the home.
- Show-ready routine: Keep surfaces clear, trash bins tucked away, and pets secured. Plan quick departures for showings.
- Lighting: Open blinds for daylight showings and turn on lamps for late afternoon or cloudy days.
- Weekend open houses: Time them for local traffic patterns and feature your best photos in promotions. If you rent staging furniture, cluster photos and events within the rental window.
- Safety and transparency: Secure valuables and prescriptions, remove sensitive documents, and be upfront about material facts like roof age or past repairs. Staging should never hide defects.
The Locke & Key approach
A phased, transparent process keeps your listing polished from day one through closing.
Pre-listing consultation: On-site walkthrough to identify your target buyer and key selling features. You receive a prioritized staging checklist and a realistic budget.
Declutter and repairs: Coordination for small fixes, professional cleaning, and touch-up painting to make the home photo ready.
Styling and soft staging: Strategic textiles, art, plants, and layout tweaks to improve flow for occupied homes.
Full staging for vacant homes: Furniture selection and installation in high-impact rooms, typically entry, living, kitchen, and primary bedroom.
Professional visuals: A planned photo shot list, plus video walkthrough and optional drone or 3D tour to showcase hero spaces and outdoor living.
Marketing handoff: The staged property goes live for showings and open houses. You receive a simple show-ready checklist and timeline.
Post-listing refresh: Quick updates between photography and events, plus seasonal swaps if your listing spans months.
Throughout, you can expect clarity about fees, rental durations, what rooms will be staged, and scheduling so there are no last-minute surprises.
Your closing checklist
Use this prioritized list to get camera ready, then showing ready.
Highest impact before photos:
- Declutter and depersonalize. Box up extra decor and personal photos.
- Deep clean kitchens, baths, and windows. Fix loose knobs and sticky doors.
- Brighten with daylight LEDs. Clean fixtures and open blinds.
- Touch up paint with warm white or soft greige. Refresh trim where scuffed.
- Stage the living room, kitchen, and primary bedroom first.
Mid impact before showings:
- Curb appeal with fresh mulch and trimmed hedges. Sweep driveway and walkways.
- Kitchen styling with clear counters and a simple centerpiece. Hide trash and recycling.
- Bathroom refresh with new towels, a fresh curtain, and clear counters.
- Declutter closets to showcase storage capacity.
Quick wins under $200:
- New welcome mat, coordinated towels, neutral throw pillows, and small greenery.
- Replace worn bedding with a crisp, neutral set.
- Swap damaged outlet covers and switch plates.
When to bring in pros:
- Full staging for vacant homes or when scale is hard to visualize.
- Partial staging for key rooms if occupied or on a tighter budget.
- Professional photography and video for almost every listing.
Ready to plan your sale with a calm, design-forward process and strong visuals tailored to Anderson buyers? Let’s talk about your home with Locke & Key Associates.
FAQs
Will staging help me net more in Anderson?
- Often yes. In markets like Anderson where buyers value condition, staging and strong visuals can increase attention and shorten time on market. Compare staging cost to local sale-price outcomes in your segment.
Should I stage if I live in the home?
- Yes. Focus on decluttering, depersonalizing, and targeted styling in the living room, kitchen, and primary bedroom. Add curb appeal and lighting upgrades.
Is professional photography really worth it?
- Nearly always. Photos drive online engagement and showing requests. Choose a photographer with local experience and plan for bright conditions.
Can I use virtual staging instead of furniture rental?
- For vacant homes, virtual staging can help online. Always disclose it and avoid misrepresenting scale or finishes. It does not replace the feel of well-staged rooms in person.
What rooms deliver the best staging ROI?
- Start with the living room, kitchen, and primary bedroom, plus curb appeal and entry. These areas shape buyer perception online and in person.
How long should my home stay show-ready?
- Keep it ready throughout the listing period. Use a daily checklist to reset surfaces, lighting, and temperature. Plan quick departures for scheduled showings.